
Trust Wallet recently underwent a complete transformation with the aim of integrating a user-friendly and dependable interface. The rebranding effort has resulted in a more contemporary and streamlined design, with a primary focus on simplifying the management of users’ digital assets.
The revamp has introduced fresh features and modifications to the wallet. Therefore, this is an opportune moment to craft a new guide article detailing the setup and utilization of Trust Wallet.
This article will offer an all-encompassing exploration of the platform, encompassing its nature, the range of digital assets it can store, the setup procedures, and methods for ensuring the security of your assets.
Disclaimer: This article is provided for informational purposes only and is not intended as investment advice. The content does not constitute a recommendation to buy, sell, or hold any securities or financial instruments. Readers should conduct their own research and consult with financial advisors before making investment decisions. The information presented may not be current and could become outdated.
About Trust Wallet

Trust Wallet is a software cryptocurrency wallet available on mobile devices and as a desktop browser extension. The Web3 wallet allows users to manage their digital assets with ease, whether they are on the go or at the comfort of their home.
It supports an extensive list of cryptocurrencies, including popular options like Bitcoin, Ethereum, and Solana, along with the ability to store and manage NFTs.
Features

- Multi-chain Support: Trust Wallet supports a wide range of blockchain networks, including Bitcoin, Ethereum, Binance Smart Chain, Avalanche, Polygon, and many more.
- Built-in dApp Browser: It has a built-in browser that allows users to interact with decentralized applications (dApps), giving users access to a wide range of DeFi (decentralized finance) protocols, NFT (non-fungible token) marketplaces, and other Web3 applications.
- Token Swaps: It allows users to swap tokens between different blockchains. This can be done quickly and easily within the app, without the need to use a centralized exchange.
- Custodial Staking: The wallet supports staking for a number of different cryptocurrencies, allowing users to earn passive income by locking up their tokens for a period of time.
- NFT Support: Trust Wallet users to store, send, and receive NFTs. Users can also view their NFT collections within the app.
- Buying Crypto In-App: It allows users to buy crypto with fiat currency using a variety of payment methods.
- Security Features: The platform has a number of security features to protect users’ funds, such as multi-signature support, hardware wallet integration, and security alerts.
Setting Up Trust Wallet
Getting started with Trust Wallet is a straightforward process that involves a few simple steps:
1. Installing Trust Wallet

Before installing the extension, ensure you are downloading the legitimate version. You can obtain the official download link from Trust Wallet’s website to guarantee the authenticity of your installation.
You can also download Trust Wallet on your mobile device.
Read: Binance & Trust Wallet Enables In-App Crypto To Fiat Withdrawals
2. Account Setup

Once the Trust Wallet app is installed, open it, and you will be greeted with a refreshing new look!
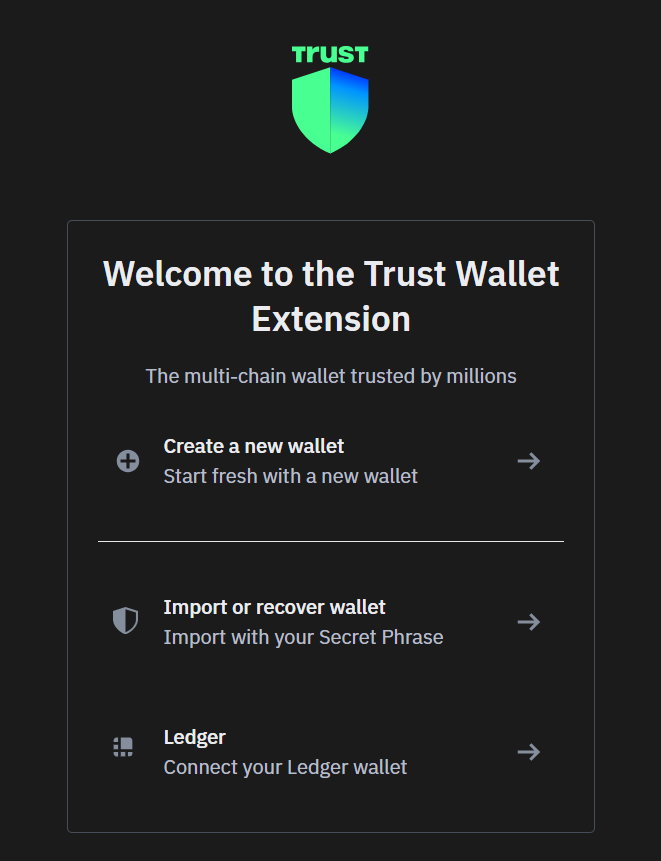
You will have the option to create a new wallet or import an existing one. For this guide, let’s select “Create a new wallet.”

After this, you will need to accept the terms and conditions. Following that, you will be prompted to create a secure 6-digit passcode (if you are on mobile) or a strong alphanumeric password (browser extension) to access the app and authorize transactions later on.

The app will subsequently request your permission to either provide or withhold your usage patterns data. The decision is entirely at your discretion.
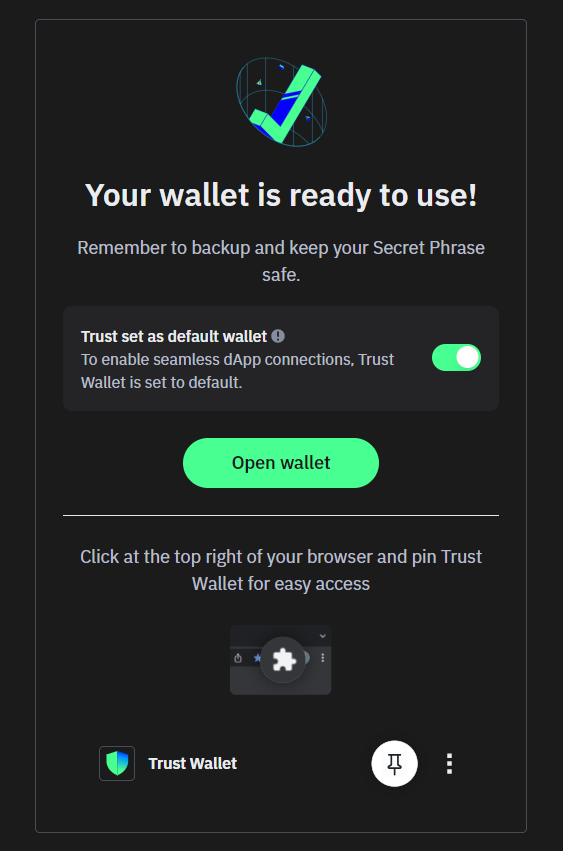
And voila! You have just completed your wallet setup.
3. Back up your Secret Phrase

In the next screen, you will be prompted to verify that you have noted down your secret phrase by arranging the provided words in the correct order.

Once you have successfully completed this process, your Trust Wallet is ready for use!
Purchasing Crypto
Now that your Trust Wallet is set up, you may be eager to start using it. To do so, you will need to acquire some cryptocurrency. There are two primary methods to get funds into your Trust Wallet:
1. In-App Purchases

To purchase cryptocurrencies directly from the app, you can navigate to the home screen and locate the “Buy & Sell” button.

Choose the crypto you want to buy from the available options, and you will be presented with the best exchange rate quotes from several third-party providers.

Select a payment provider and you will be redirected to a payment gateway where you can make your purchase using a debit or credit card.
It is important to note that there is typically a minimum purchase requirement, and card-based purchases may involve higher fees.
2. Transferring Funds into Trust Wallet
If you already own cryptocurrencies on a centralized exchange and wish to move them into Trust Wallet, the process is relatively simple:

Click on the “Receive” button on the home screen.

Select the desired cryptocurrency.

You will be provided with a QR code and an address to which you can send your crypto.
Read: How To Transfer Your Crypto From Coinbase to Trust Wallet
Final Thoughts
Overall, Trust Wallet presents a compelling choice for anyone seeking a user-friendly, versatile solution for managing their digital assets, exploring various blockchain networks and Ethereum Virtual Machine (EVM) chains.
Its ease of use, compatibility with a wide range of cryptocurrencies, and direct interaction with dApps make it a valuable tool for both newcomers and experienced crypto enthusiasts. Whether you are buying, storing, or transacting with cryptocurrencies and NFTs, this Web3 wallet puts the power of the blockchain in your hands, offering a secure and accessible platform to cater your needs.


